Connect Google Tag Manager first. GTM acts as the container for client-side tags that Webgarh GTM Assistant publishes for GA4 and other platforms.
Setup Steps
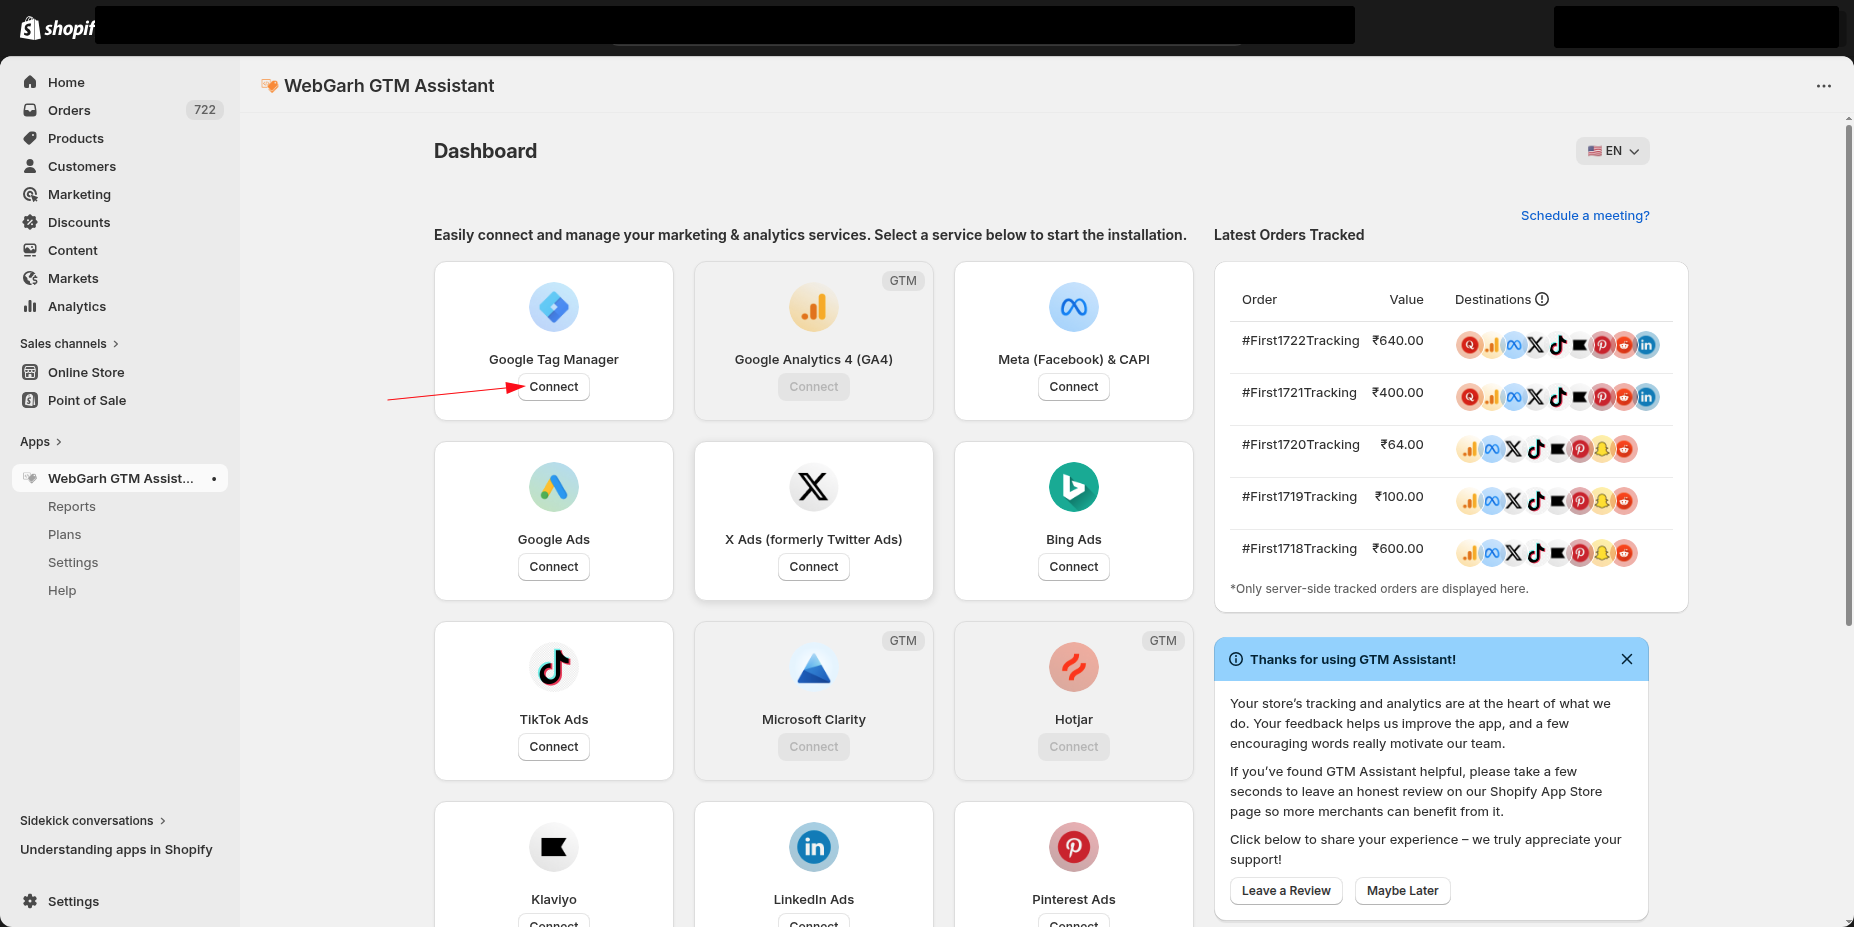
Connect your GTM account
- In the Webgarh GTM Assistant dashboard, click Connect on the Google Tag Manager platform card.
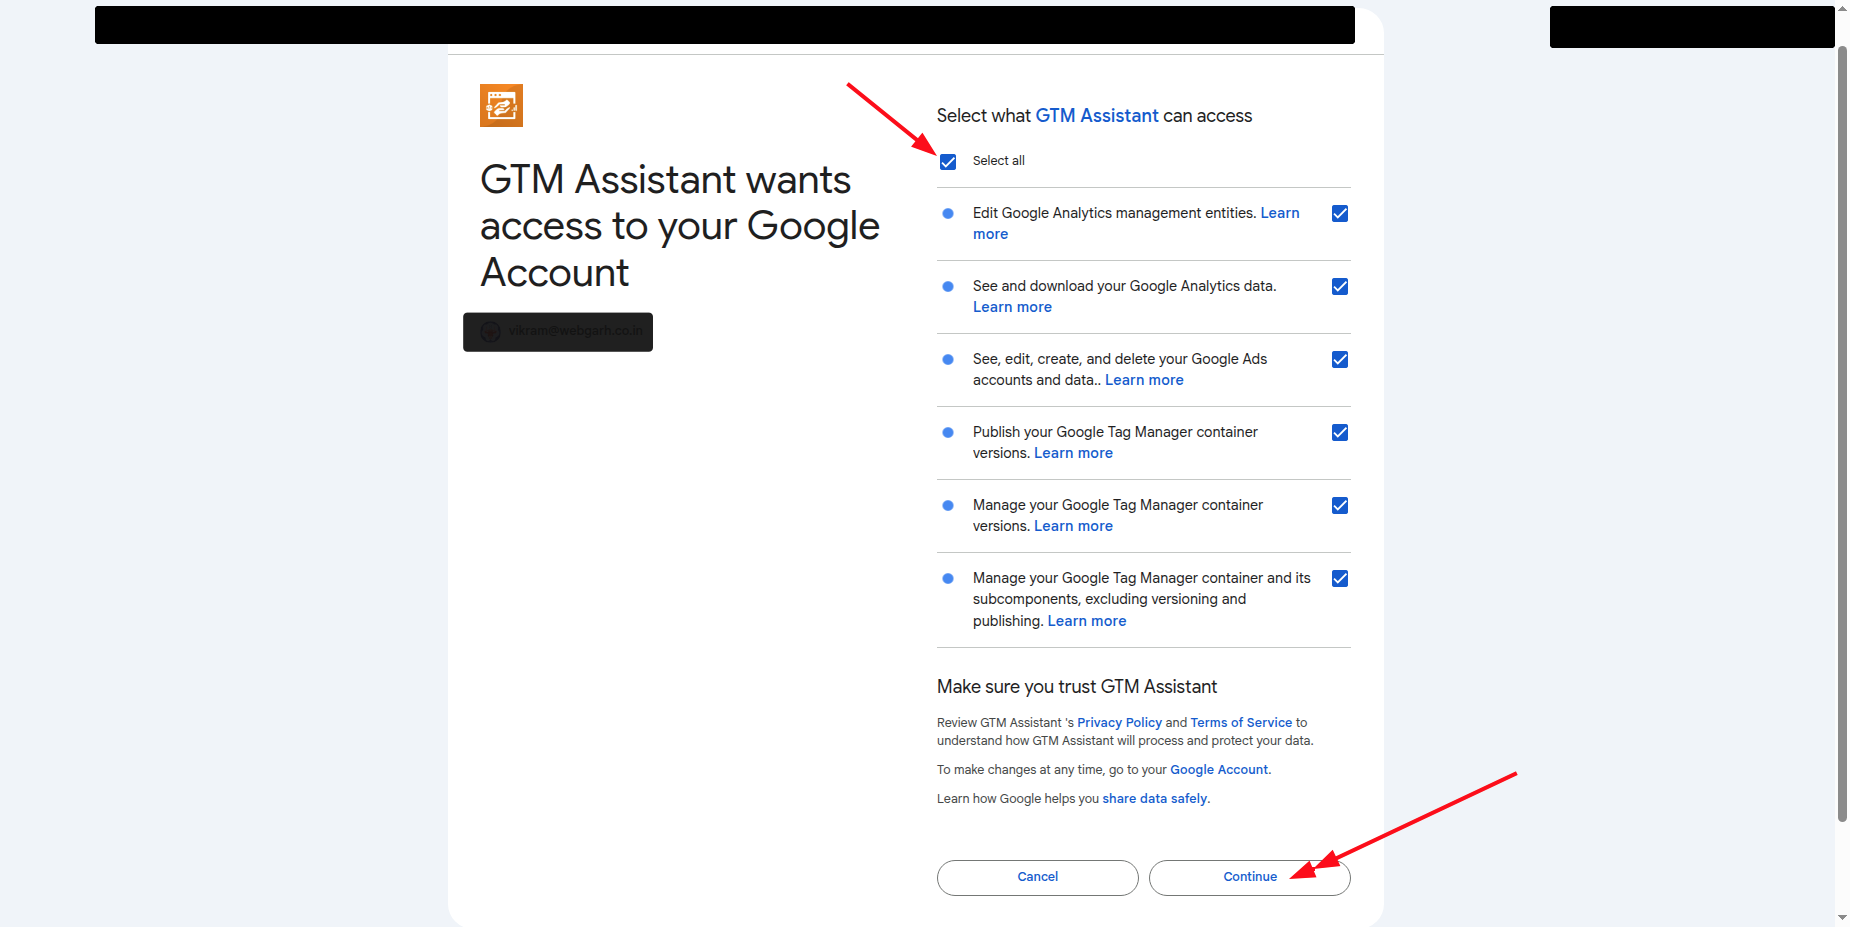
- Click Login and sign in with the Google account that has access to your GTM account.
- Select all requested permissions during the Google login flow.
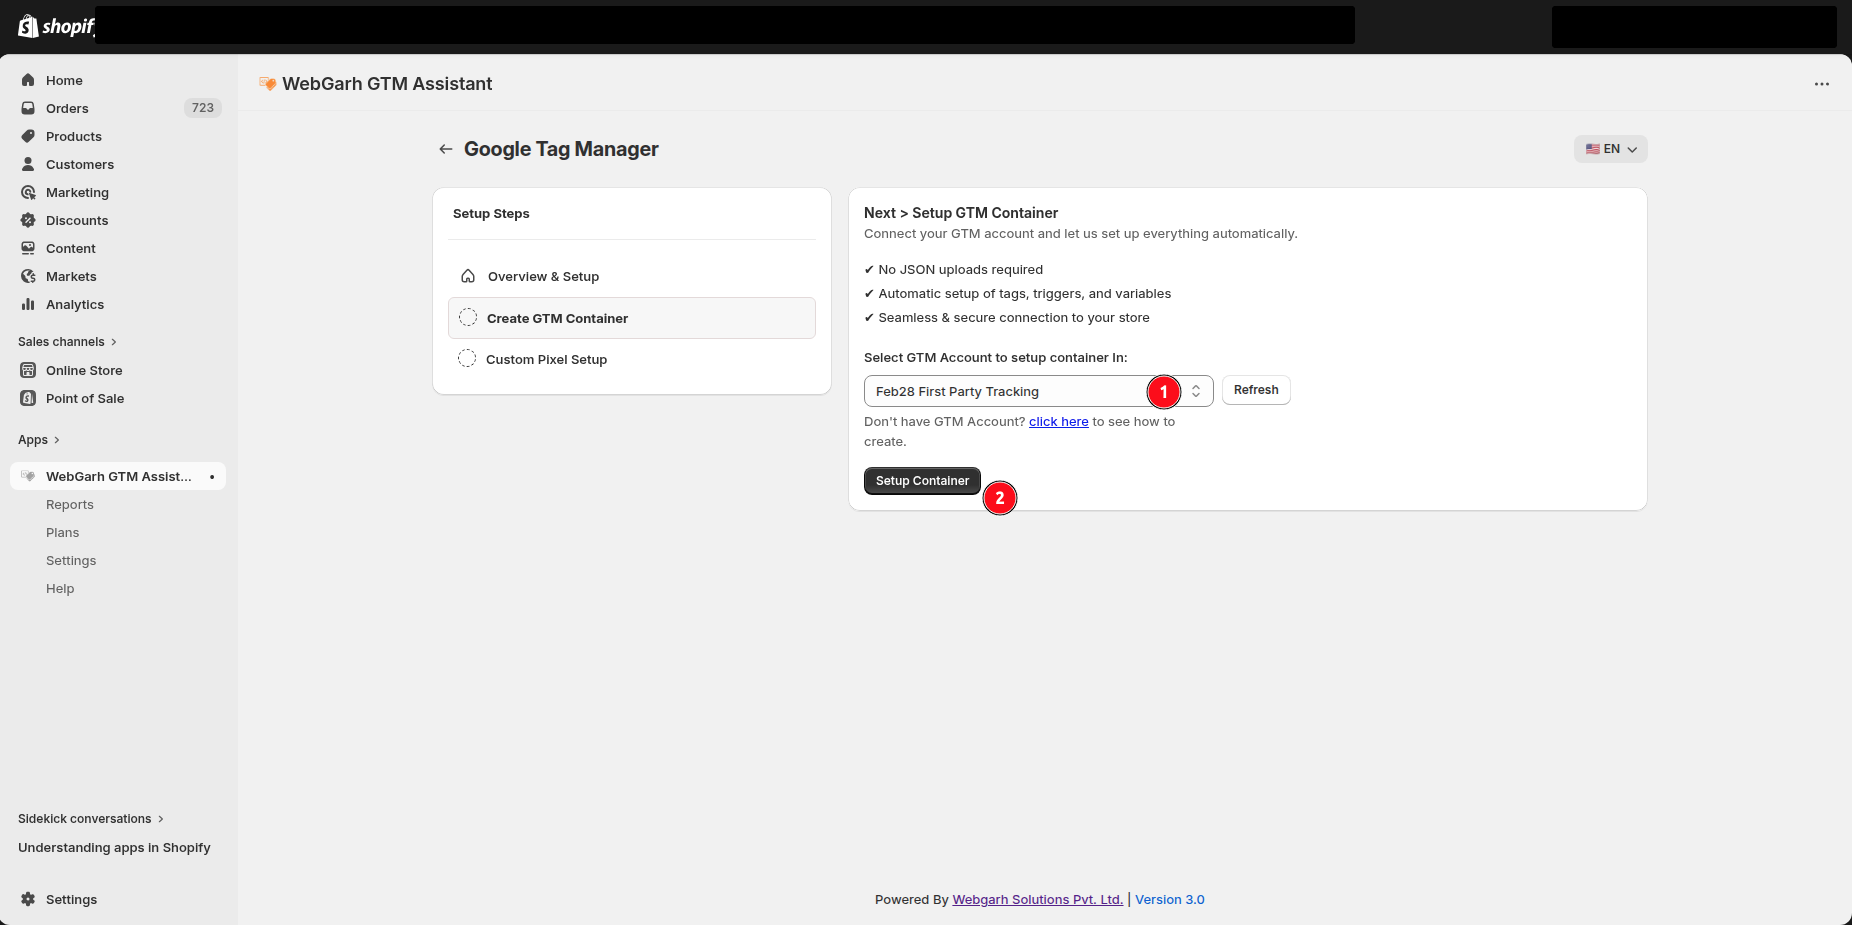
- Choose your GTM account and click Setup container.
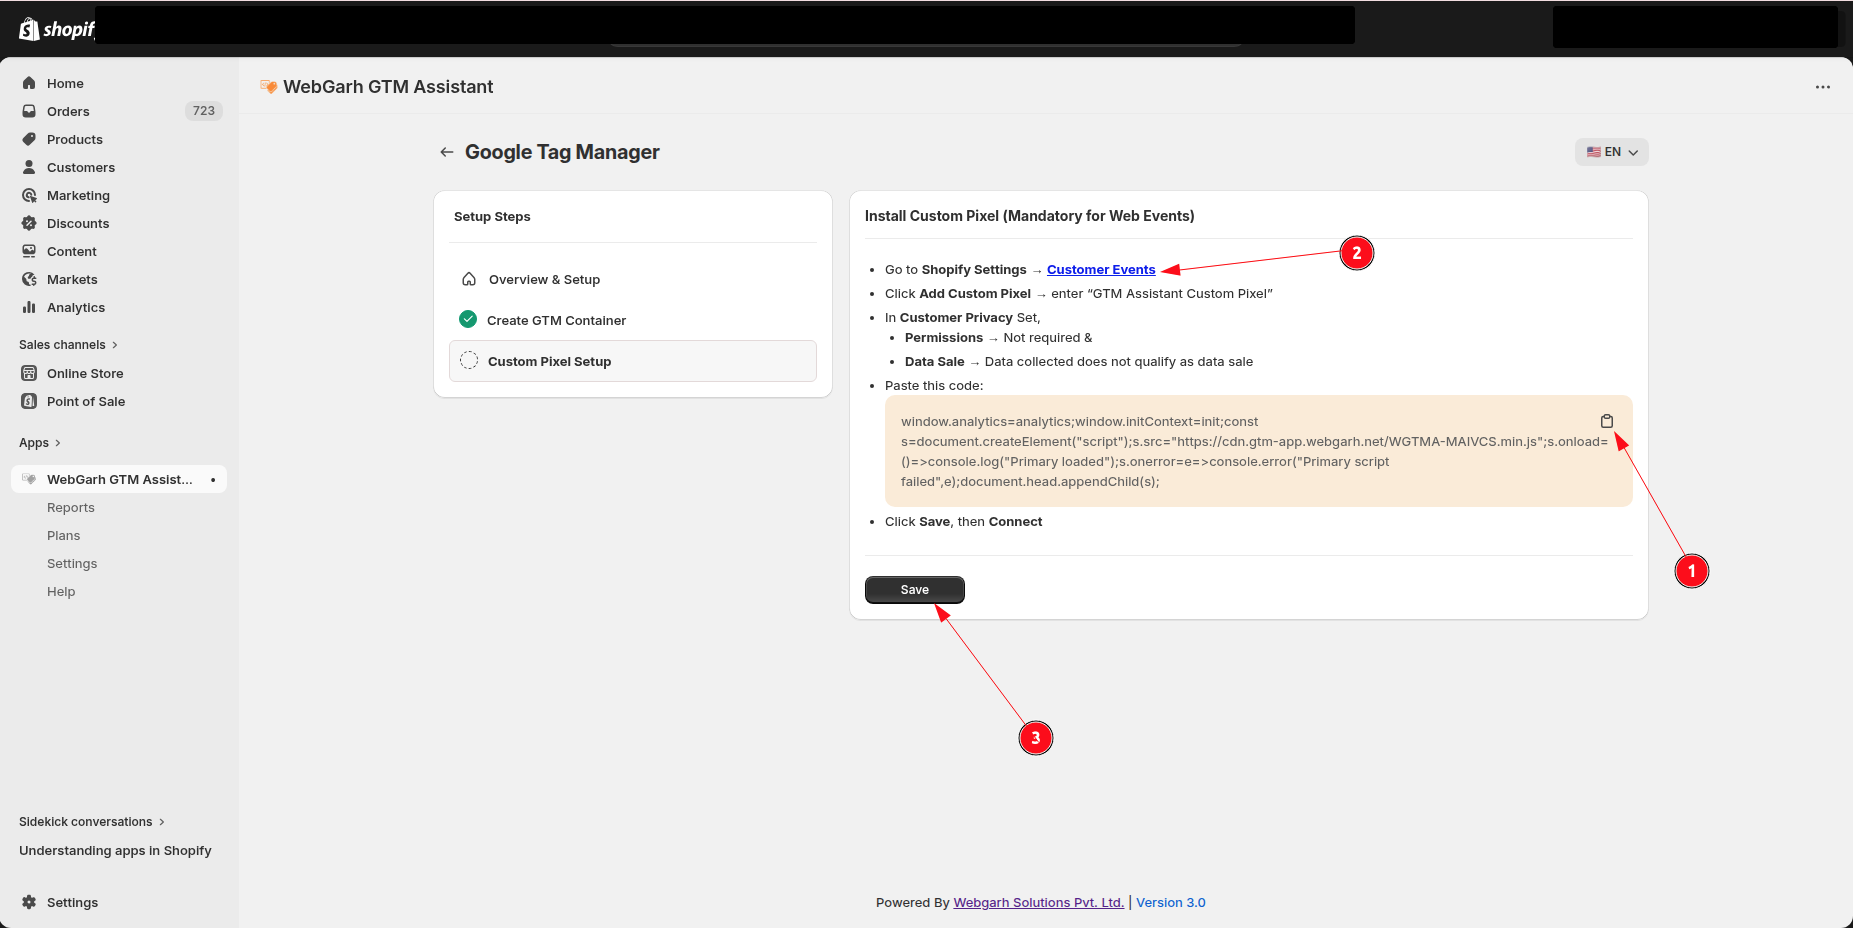
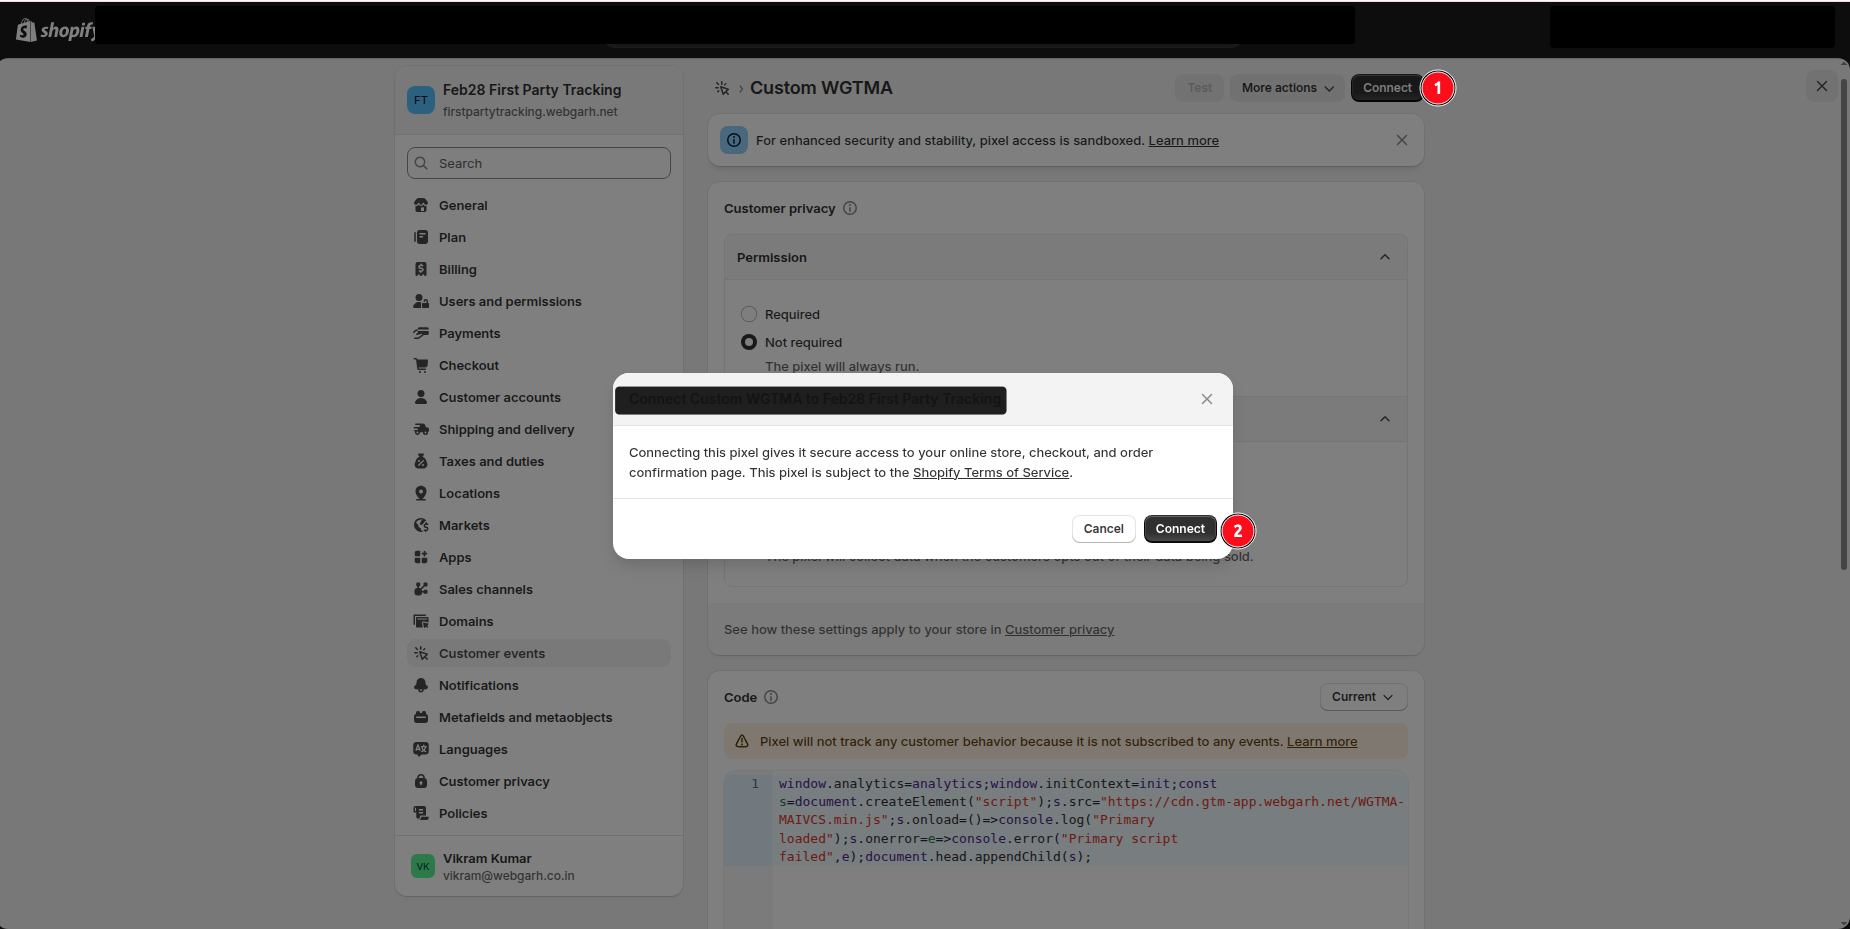
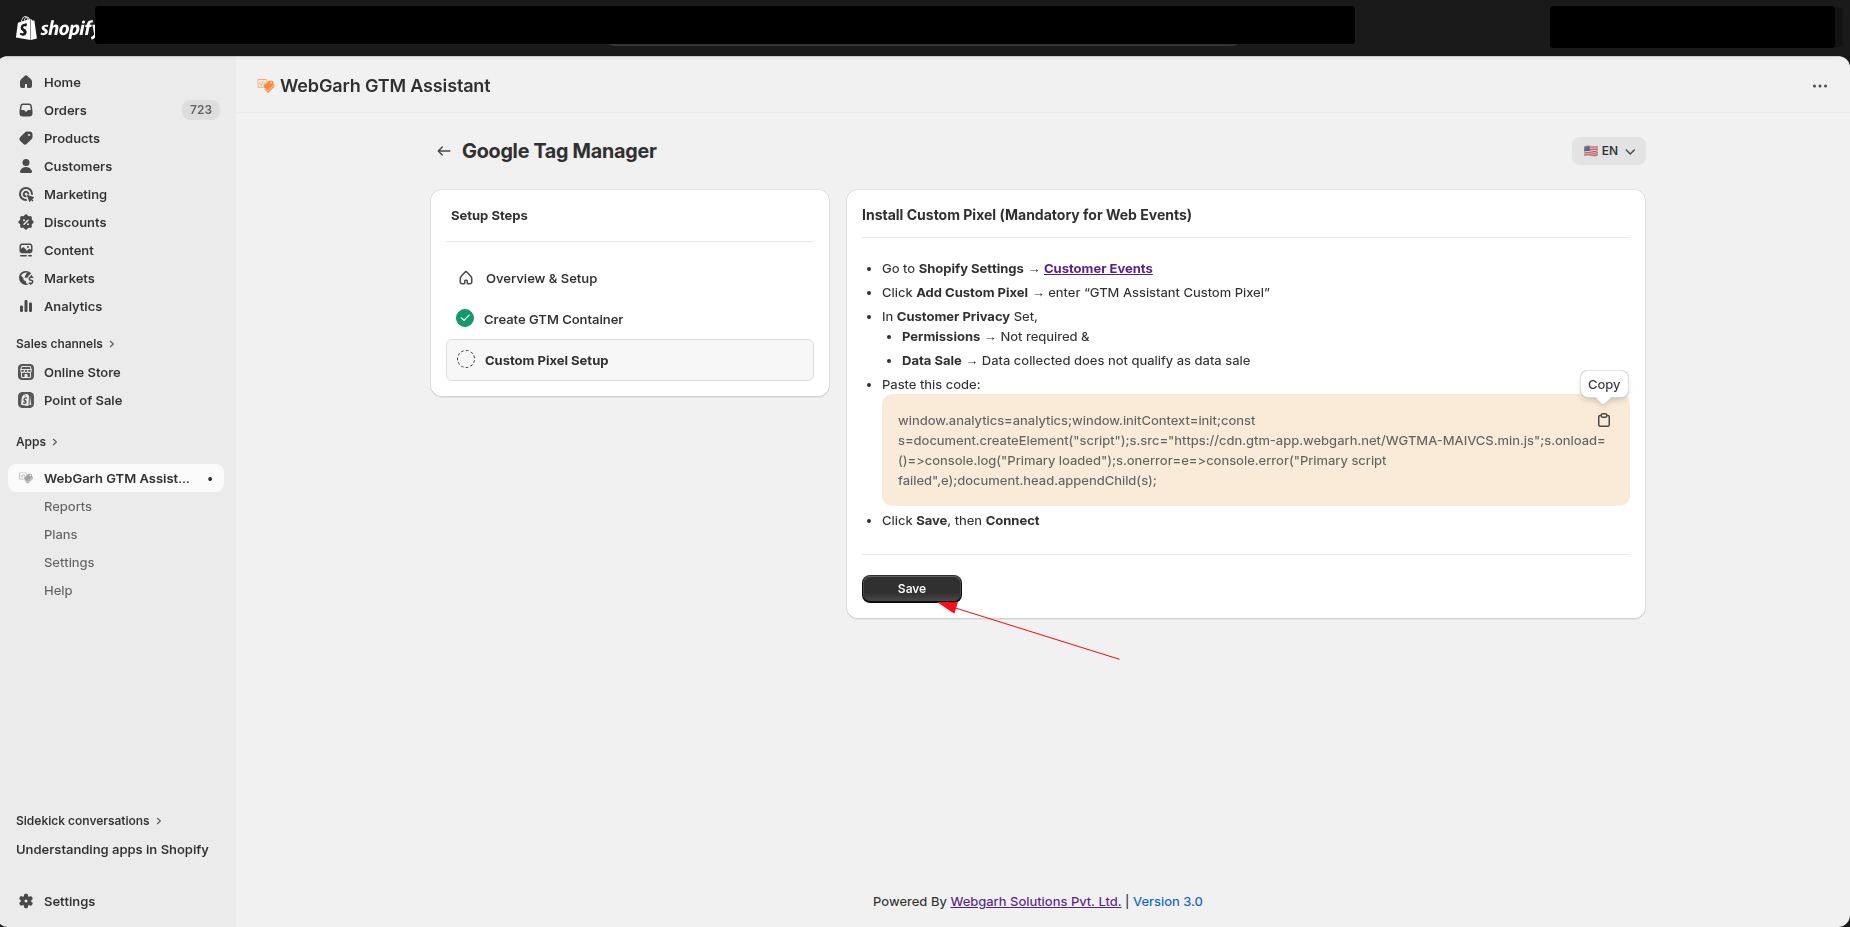
Create the Shopify custom pixel
- Copy the pixel code shown by Webgarh GTM Assistant.
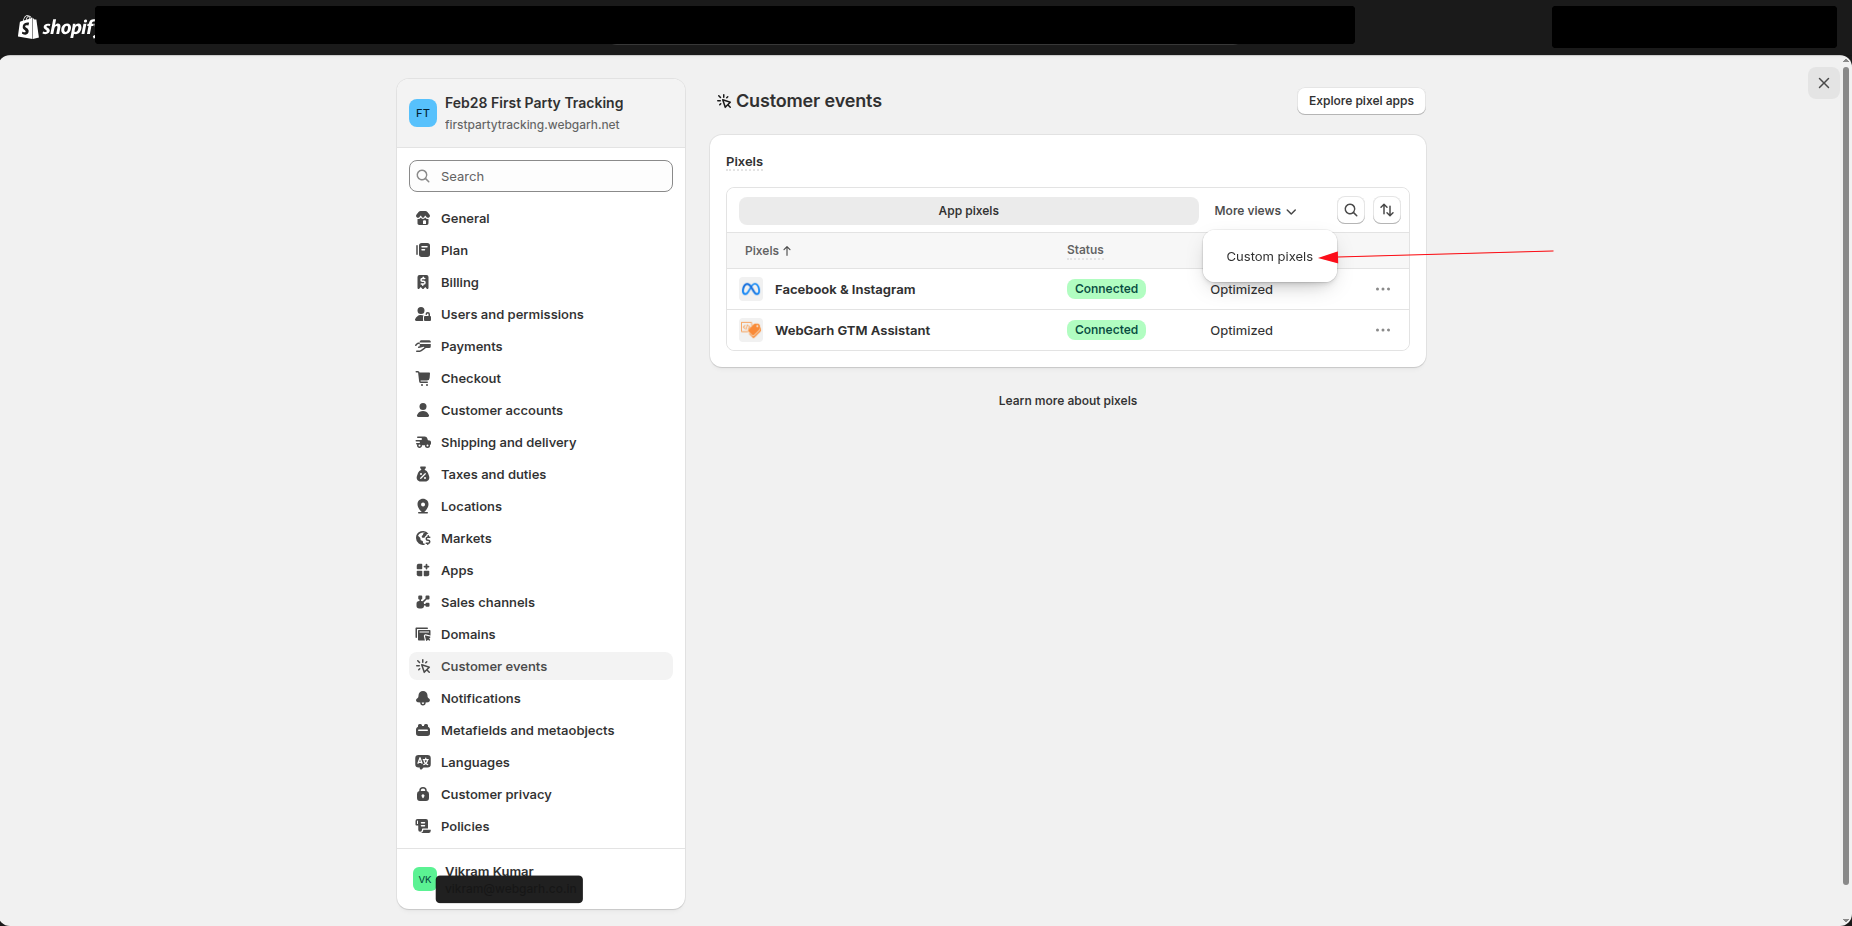
- Open Shopify Customer events from the link in the app.
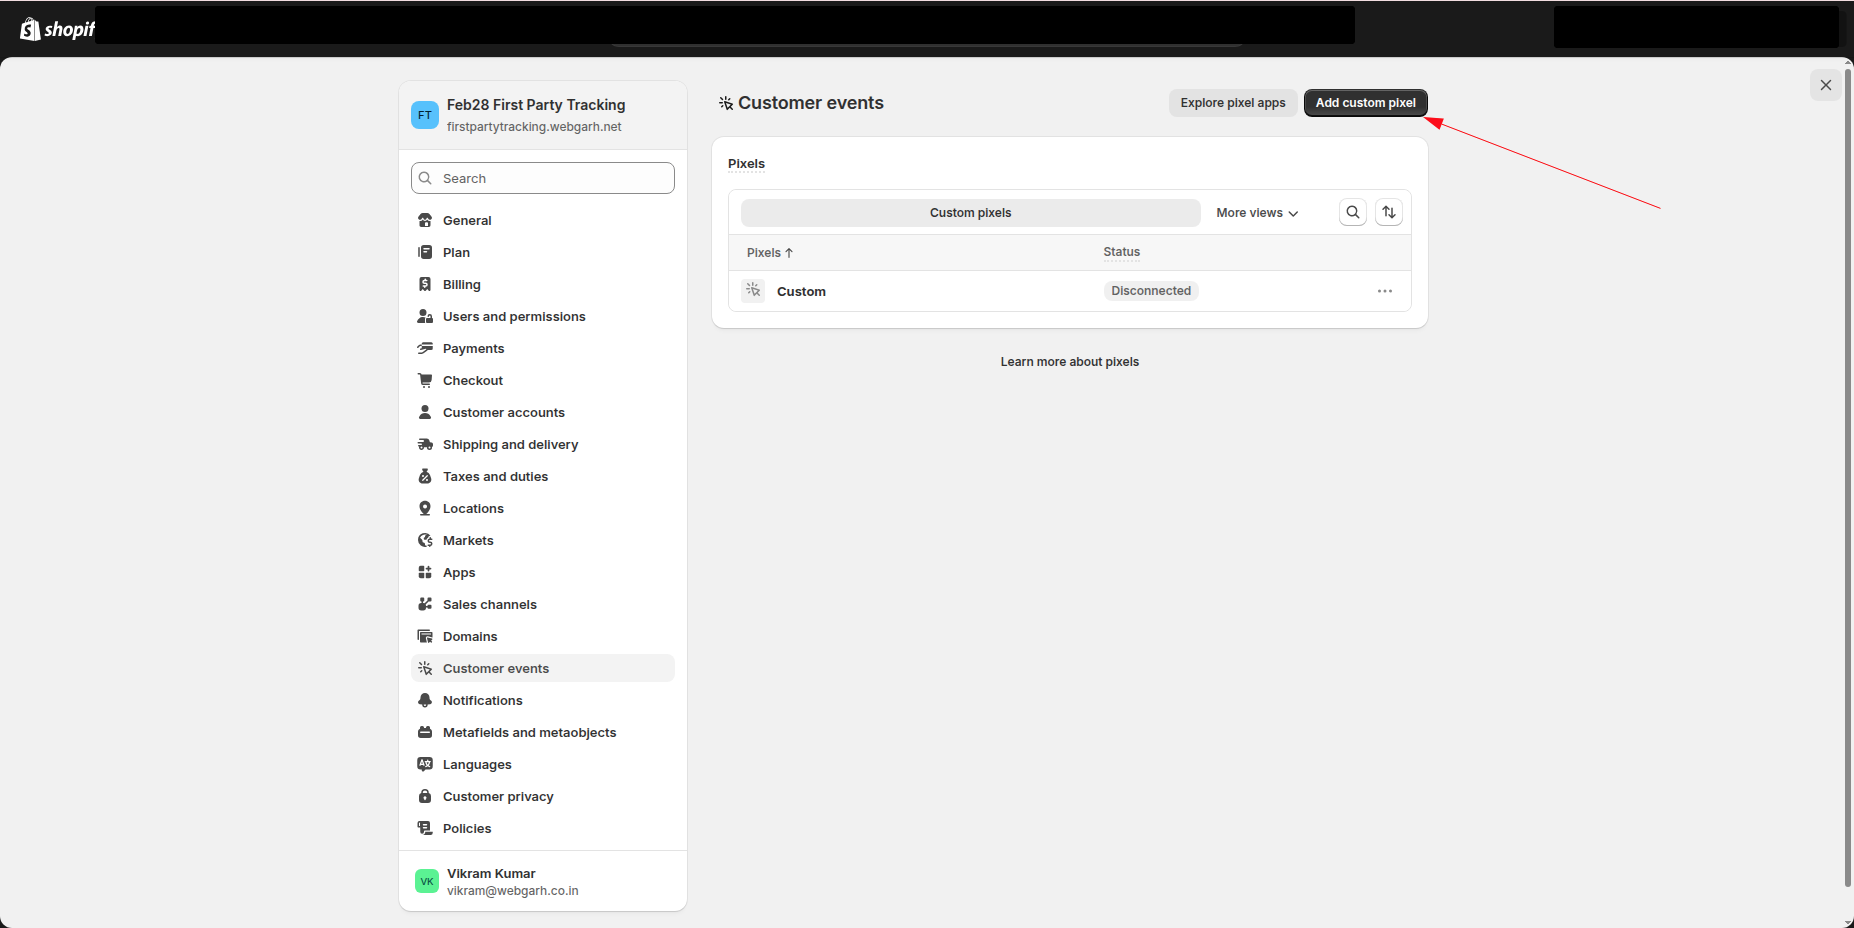
- Choose Custom Pixel from More views.
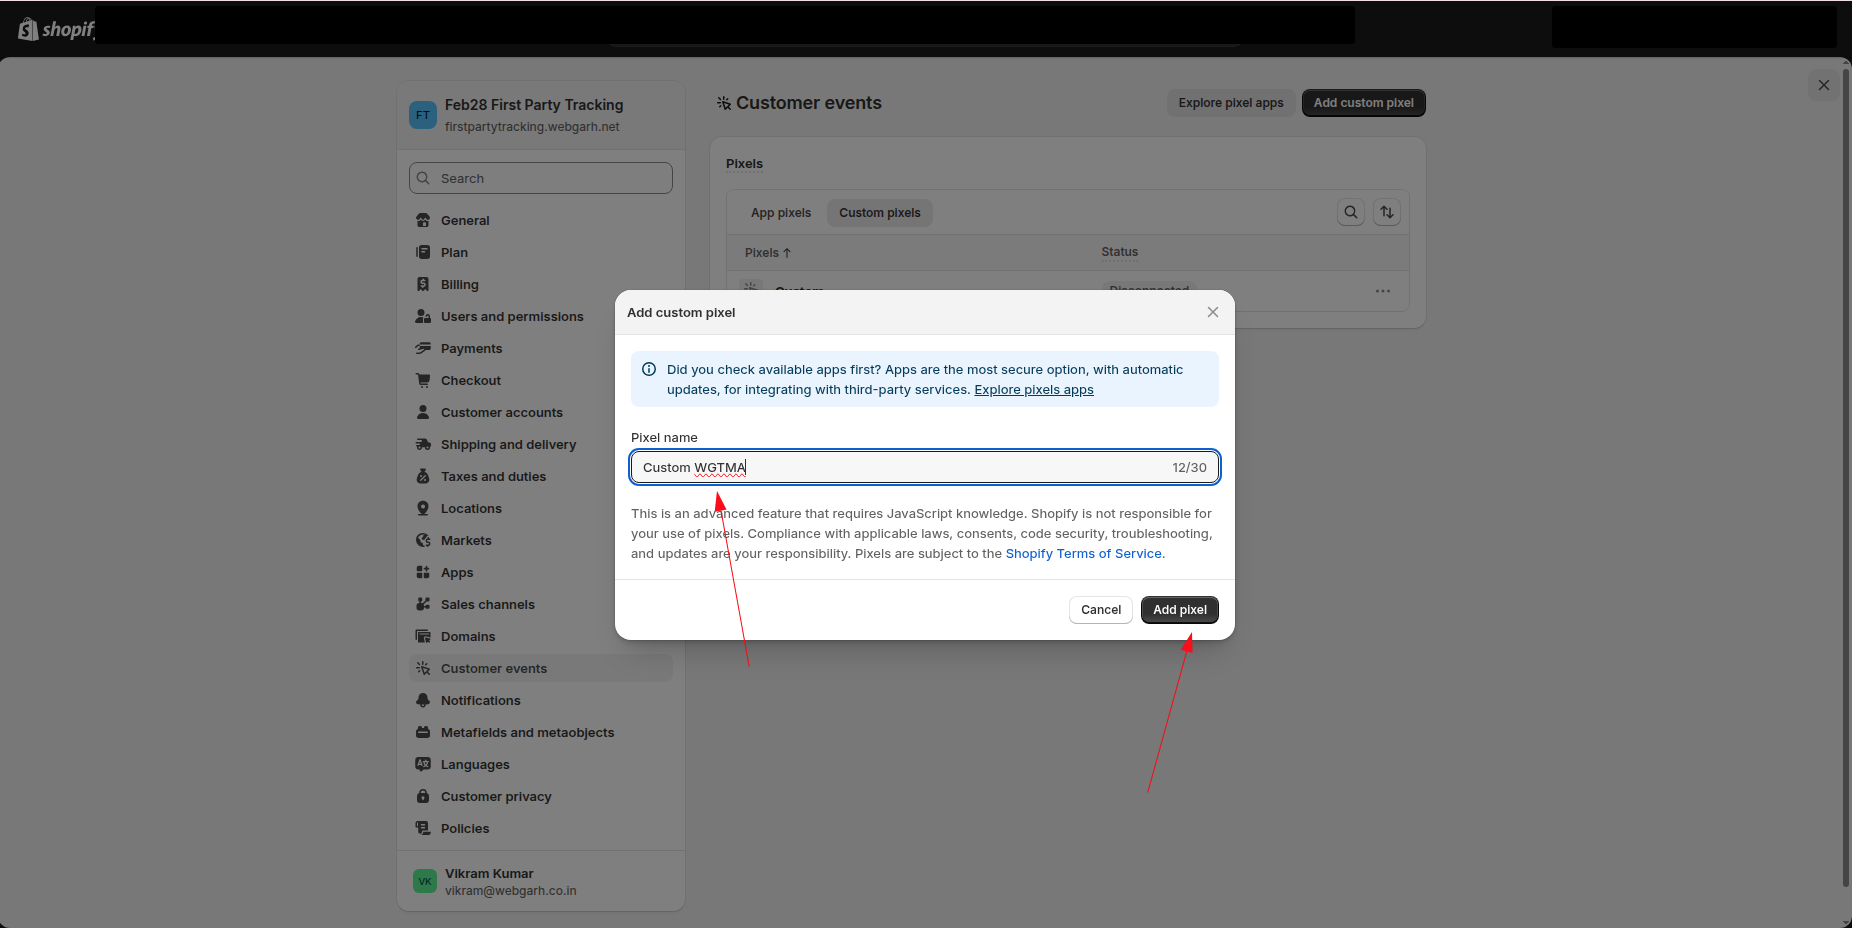
- Click Add custom pixel, enter a name, and add the pixel.
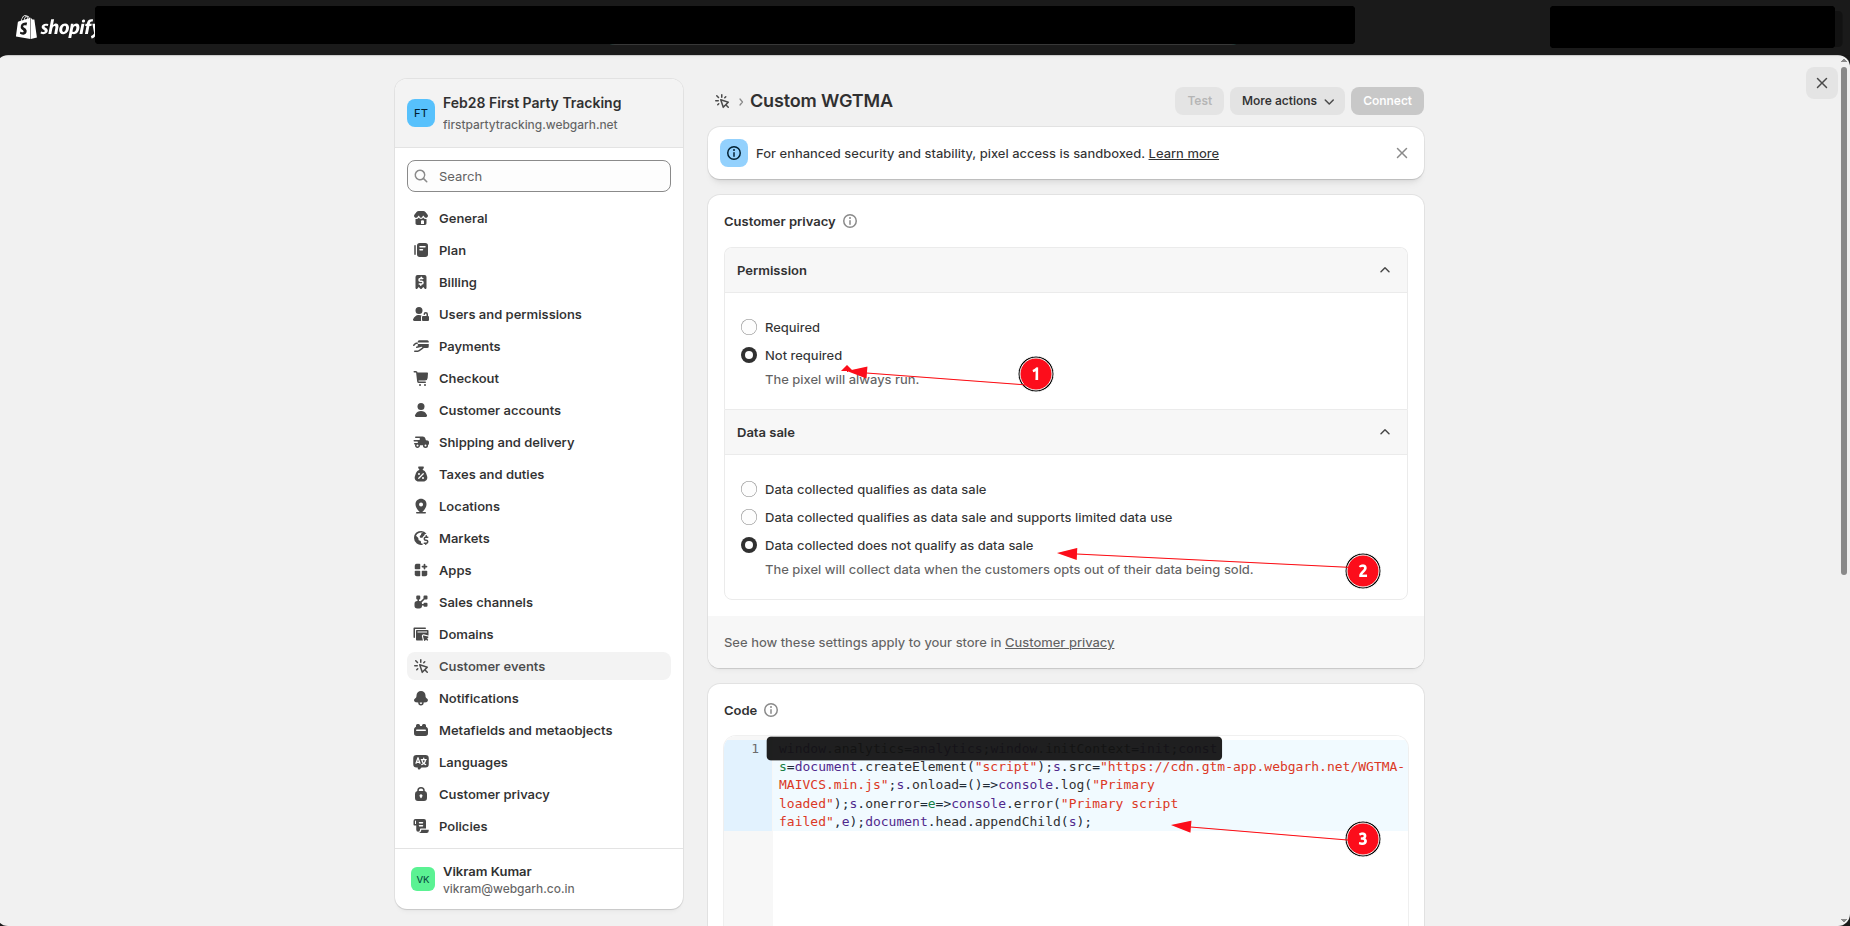
- Set Permission to Not required and Data sale to Data collected does not qualify as data sale.
- Paste the copied code into the code section and save it.
Connect and save
- After saving the pixel, click Connect in Shopify.
- Return to the Webgarh GTM Assistant tab and save GTM.
The custom pixel is mandatory. Without it, client-side tracking will not be accurate.
Visual Walkthrough
Use the screenshots below alongside the steps above to match each instruction with the correct screen in the platform.

Still need help?
Our team can walk you through this. Contact support or message us on WhatsApp.