Use this guide to connect Google Analytics 4 after Google Tag Manager has been connected in Webgarh GTM Assistant.
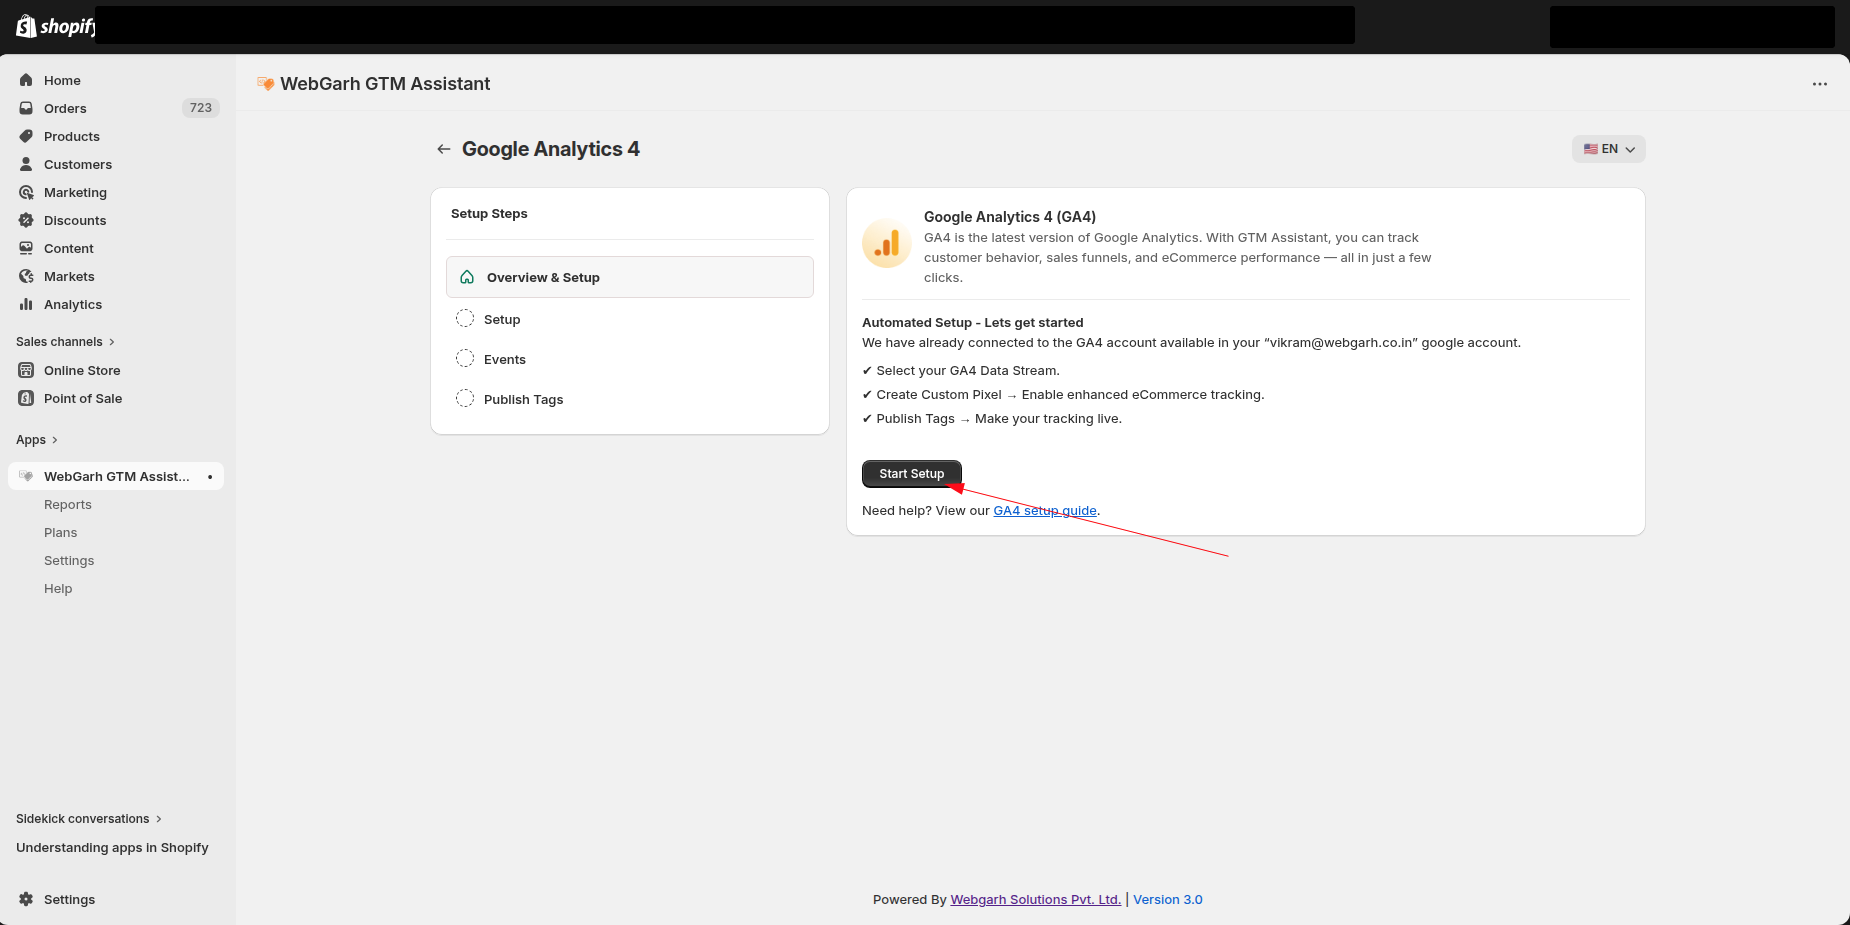
Setup Steps
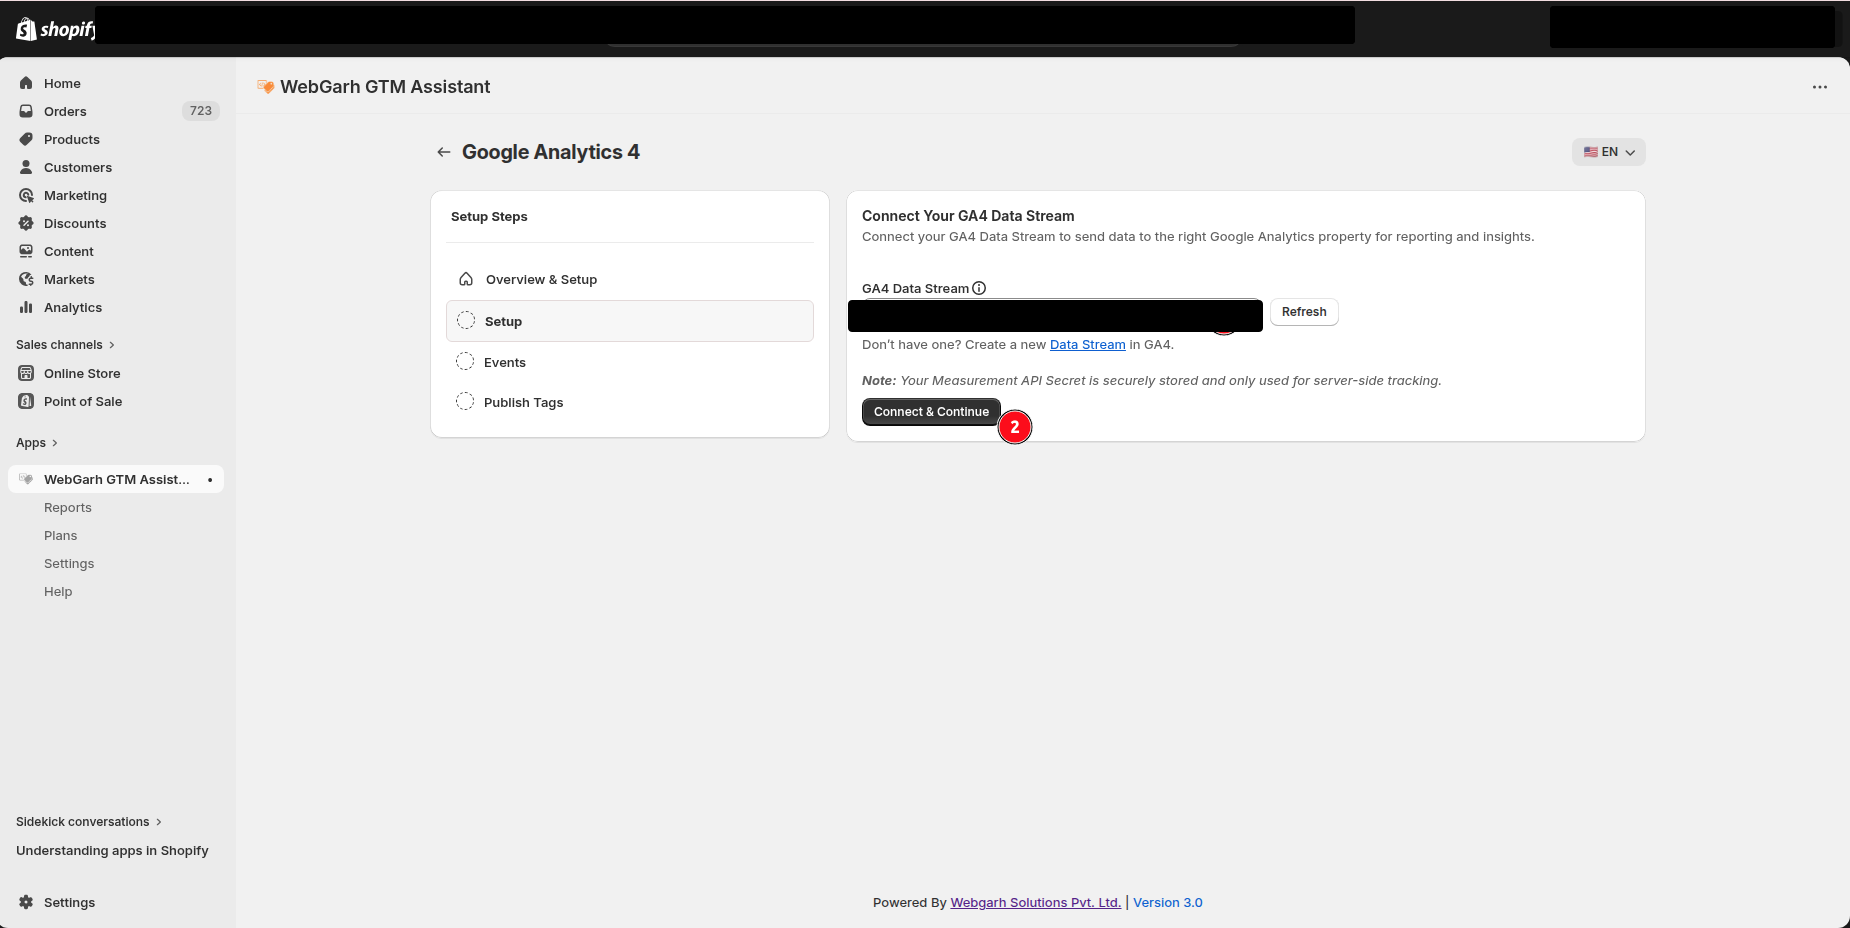
Select your GA4 property
- In the Webgarh GTM Assistant dashboard, open the GA4 section.
- Click Start setup.
- Choose the GA4 property you want to connect.
- Click Connect & Continue.
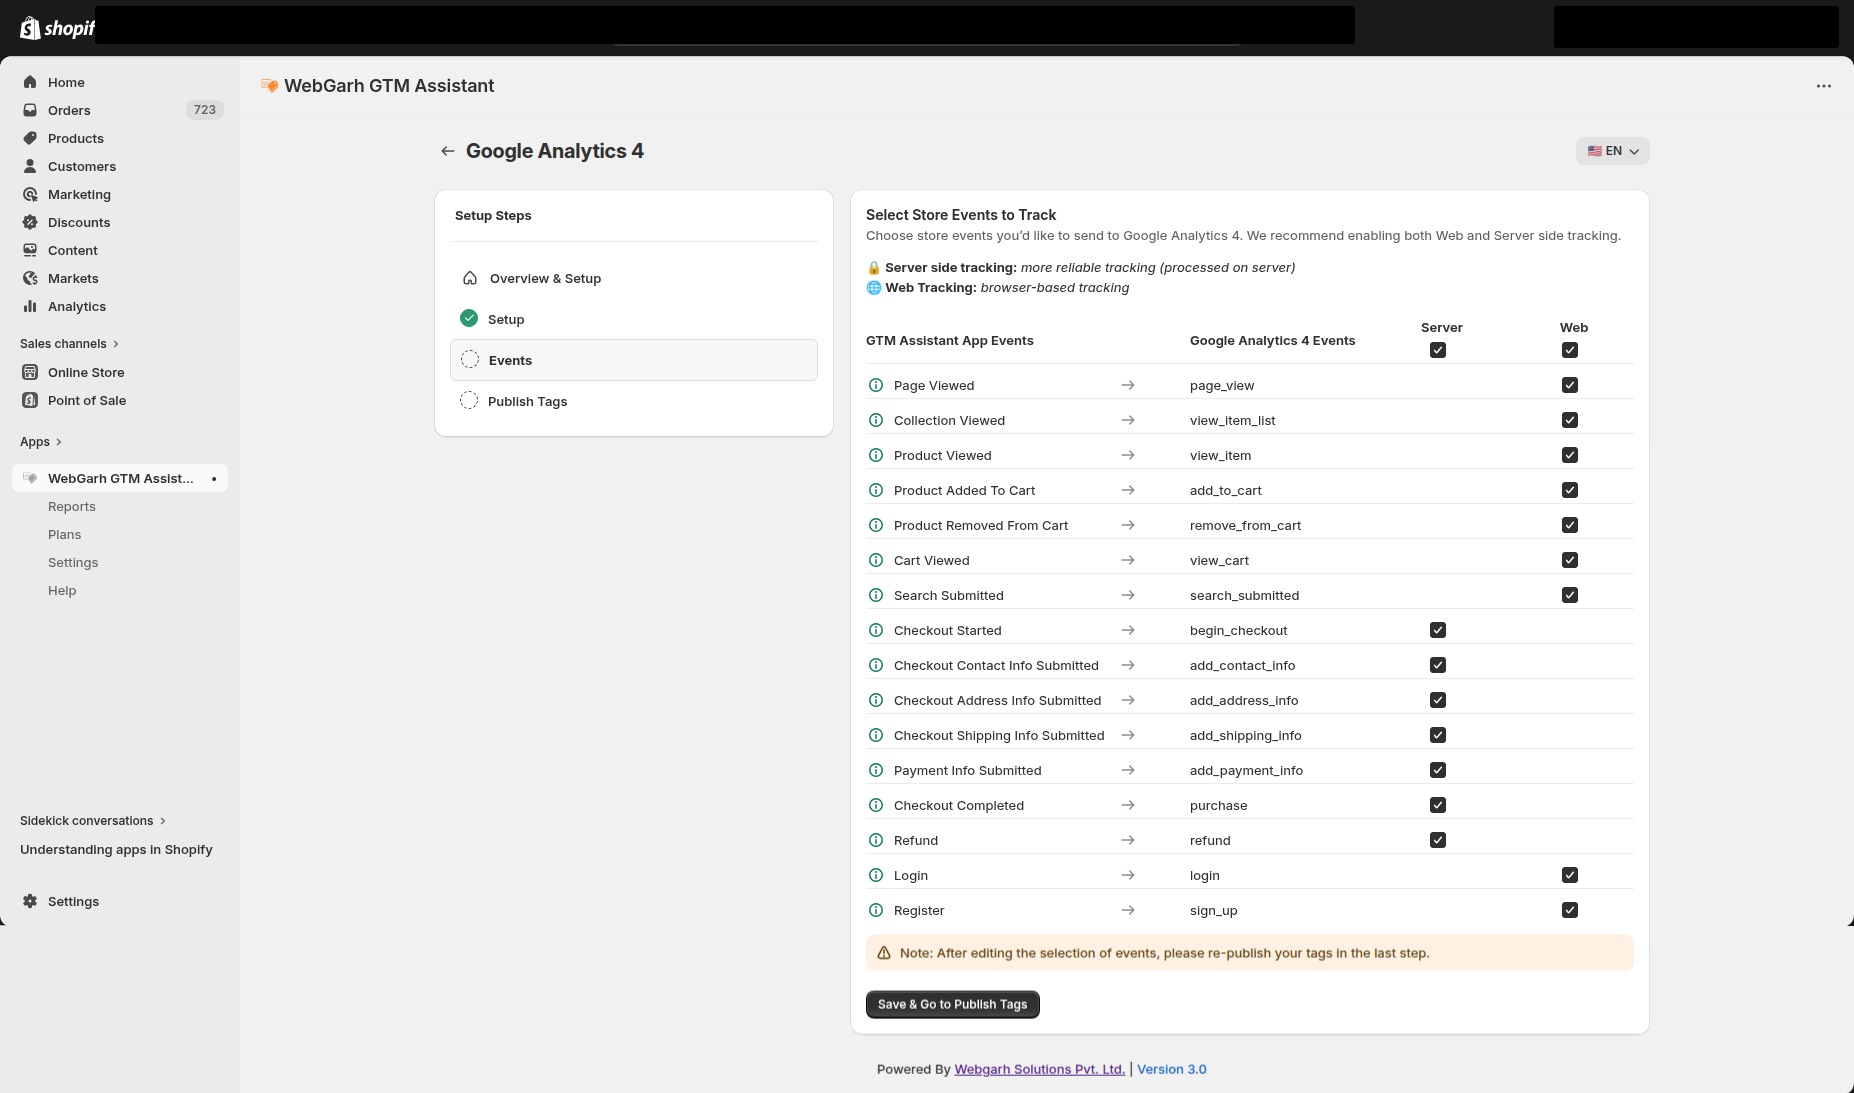
Choose events
- Select the Shopify events you want to track in GA4.
- For best reporting, choose all recommended events such as View Item, Add to Cart, Begin Checkout, and Purchase.
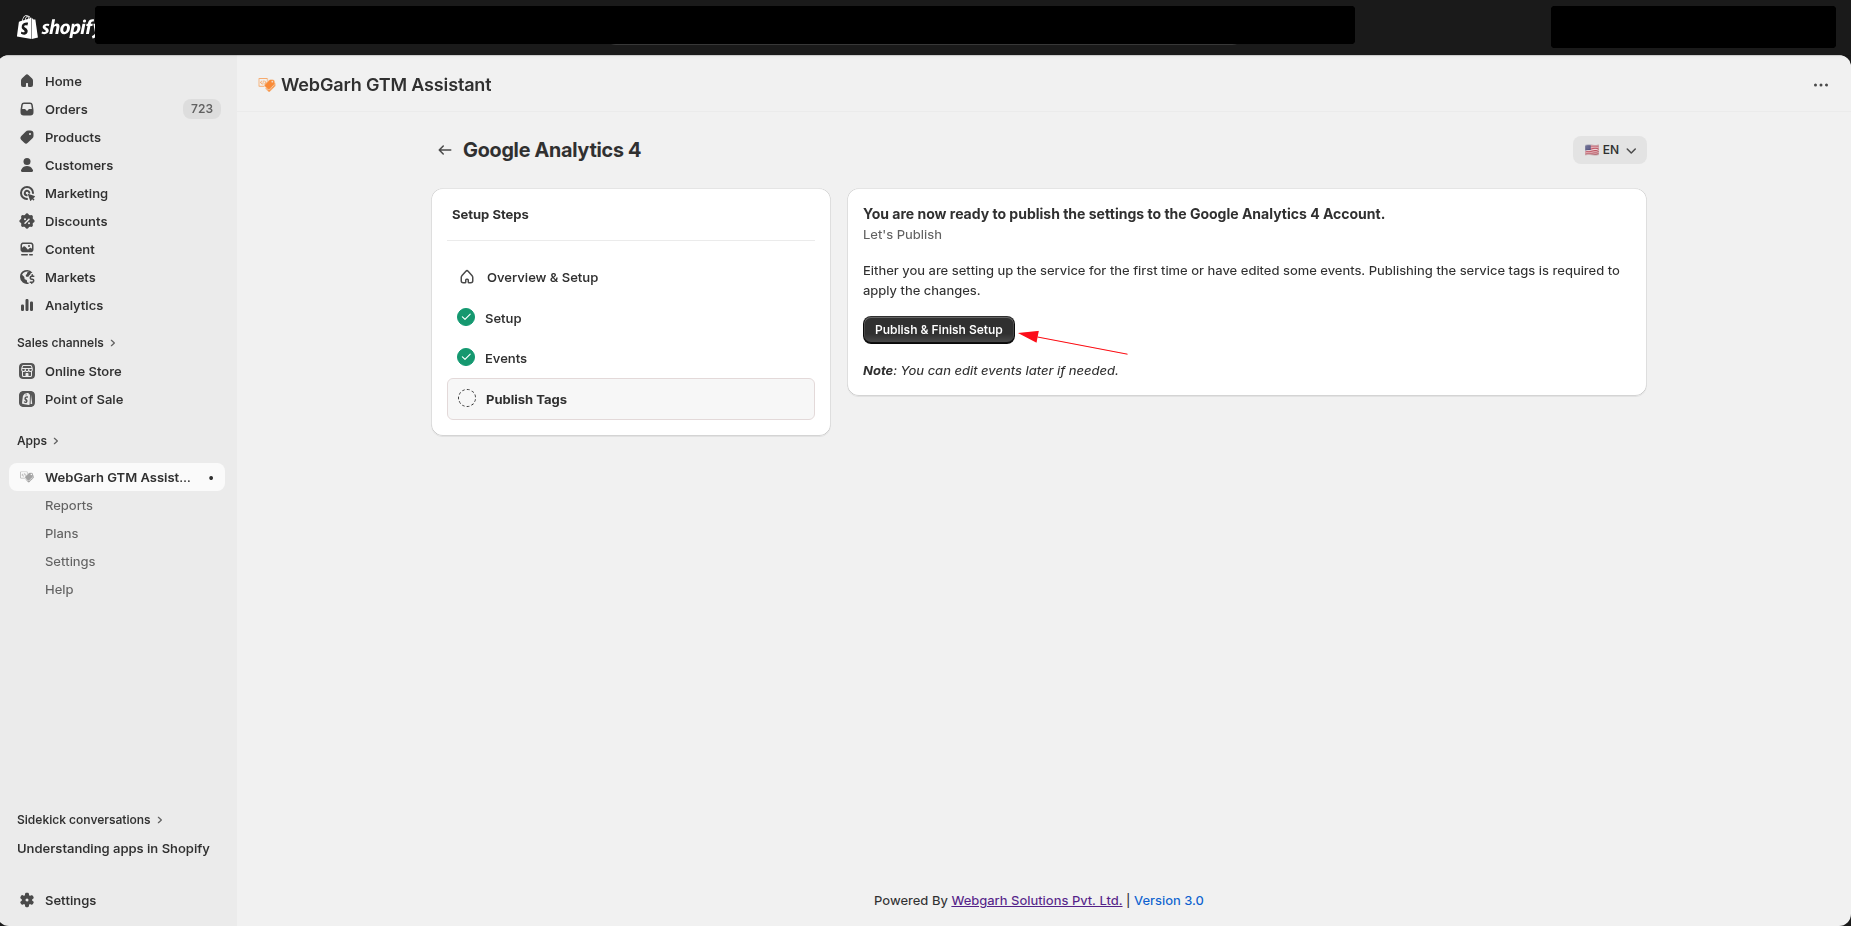
Publish the setup
- Click Publish & Finish Setup.
- Server-side tracking starts immediately.
- Browser tags may take a few minutes to sync until all tags are created in the connected GTM container.
GA4 setup depends on GTM being connected first because GTM holds the client-side tags.
Visual Walkthrough
Use the screenshots below alongside the steps above to match each instruction with the correct screen in the platform.
Still need help?
Our team can walk you through this. Contact support or message us on WhatsApp.