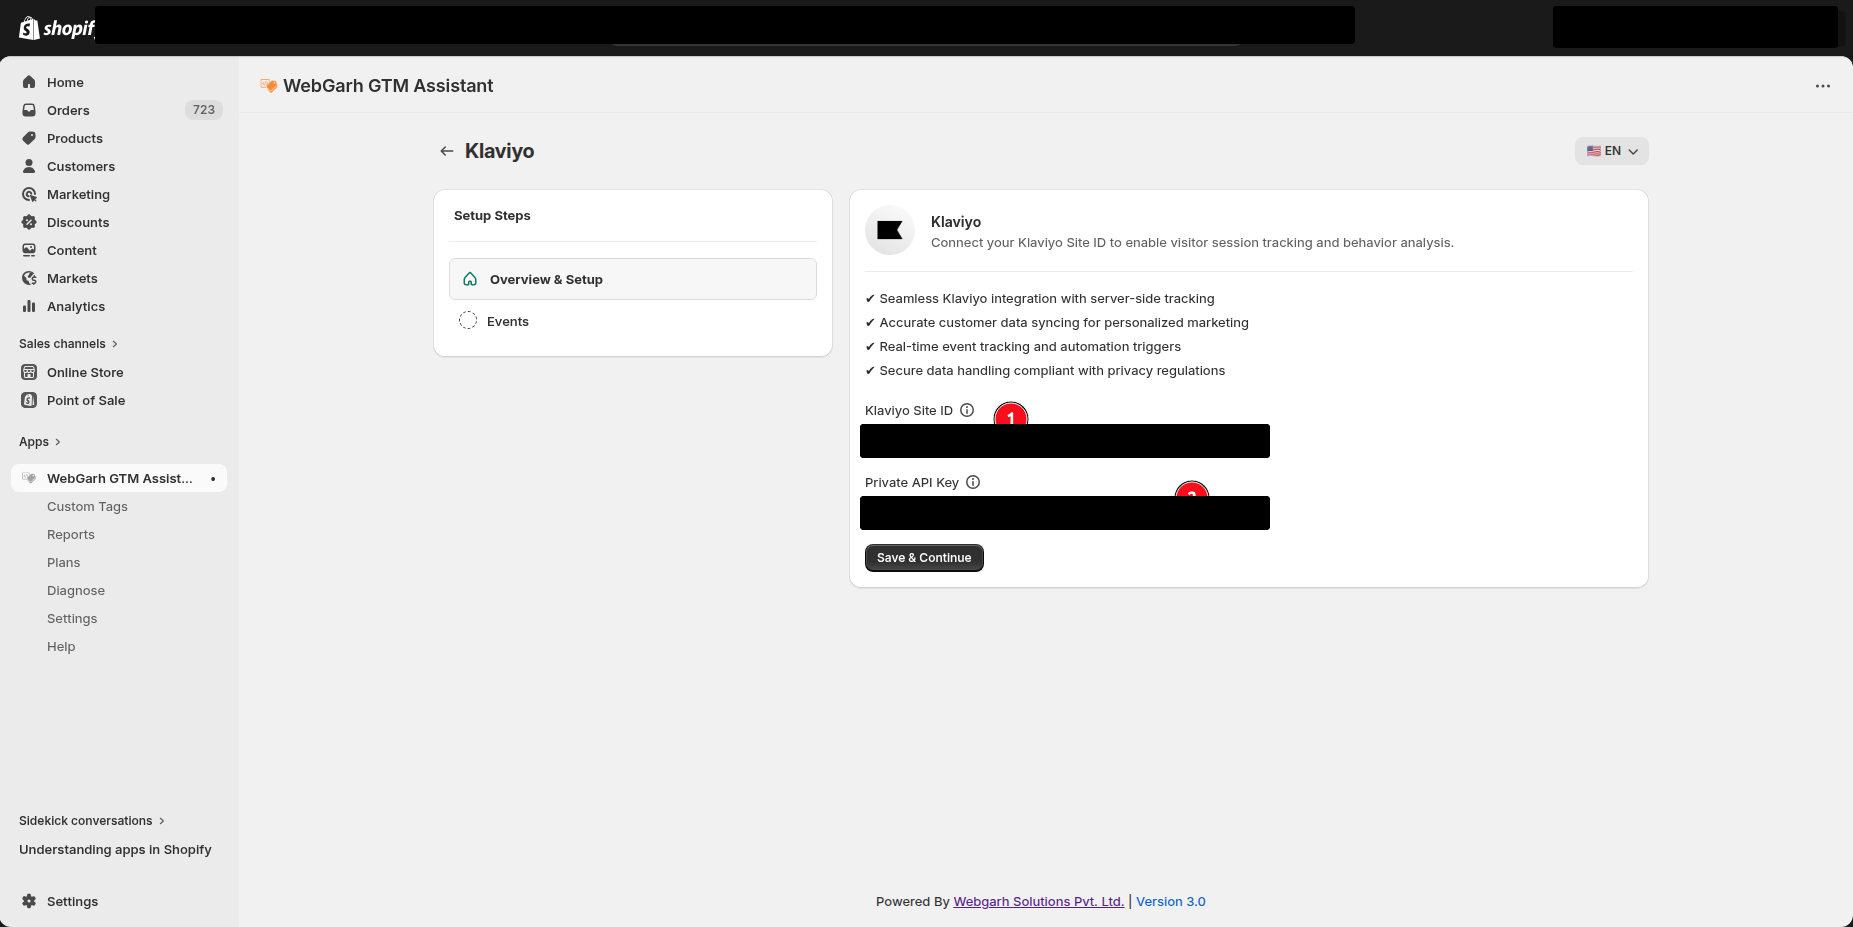
Connect Klaviyo with a Site ID and Private API Key so Webgarh GTM Assistant can send Shopify behavior and purchase events.
Setup Steps
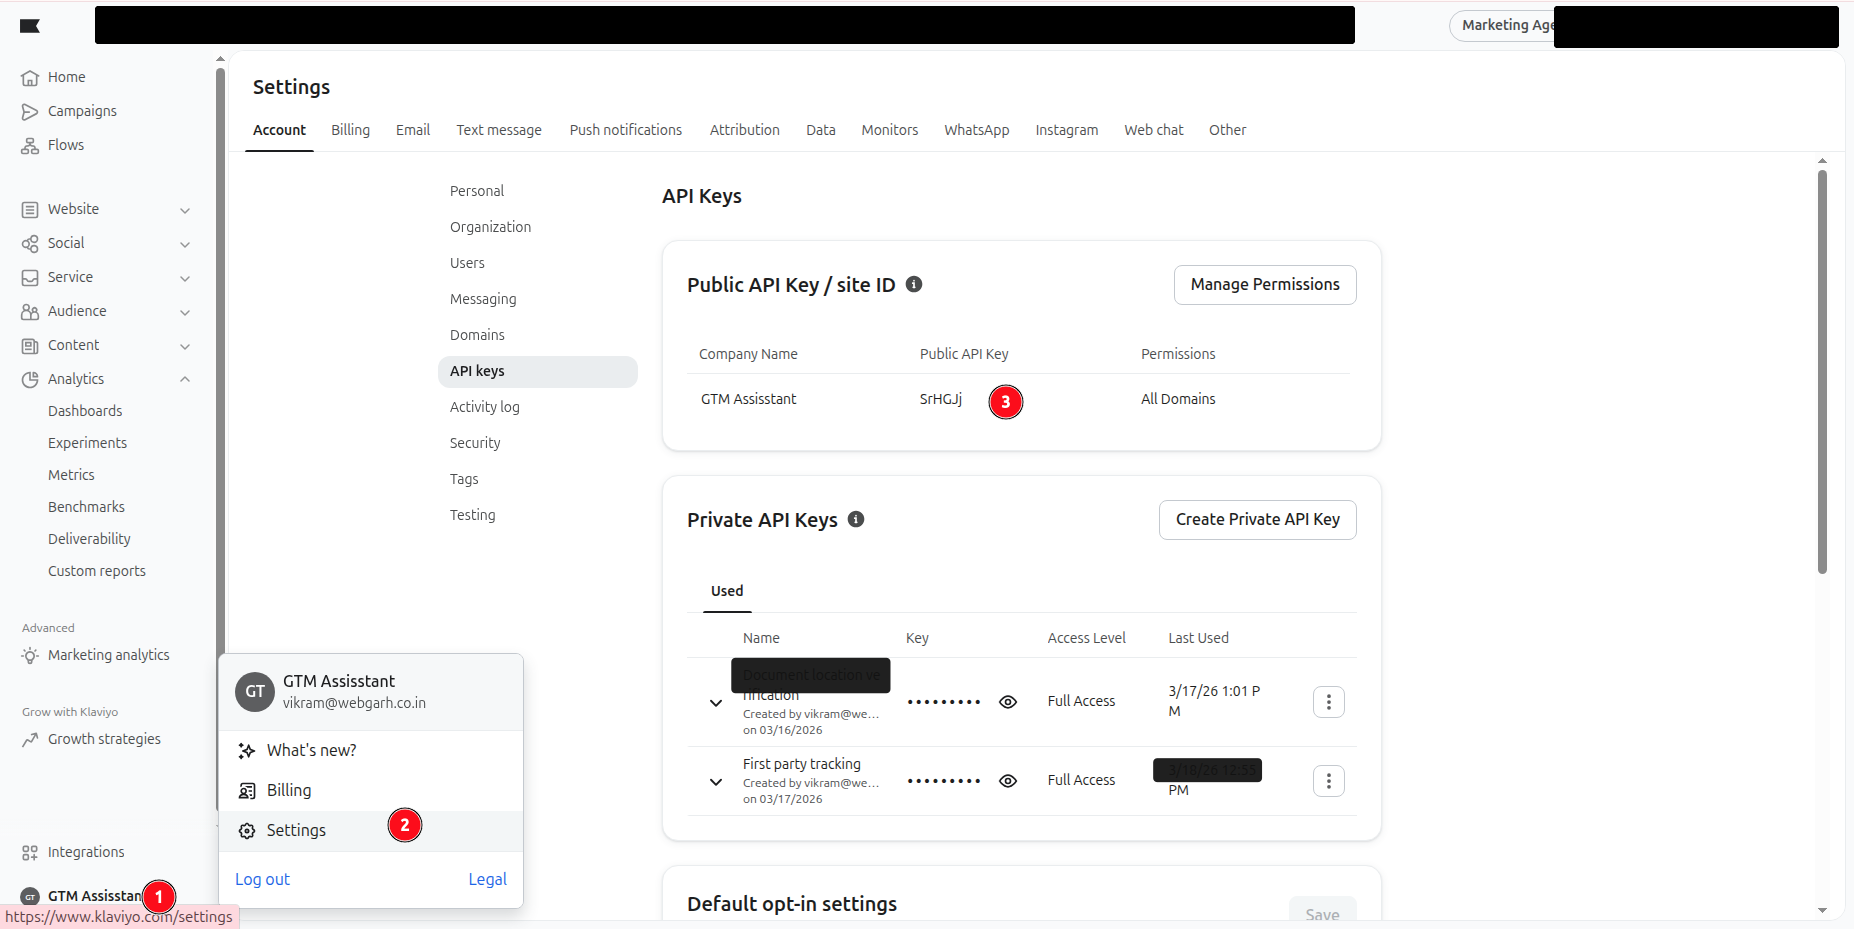
Find your Site ID
- Log in to Klaviyo.
- Click your account name and open Settings.
- Go to Account, then API Keys.
- Copy the Site ID from the Public API Key section.
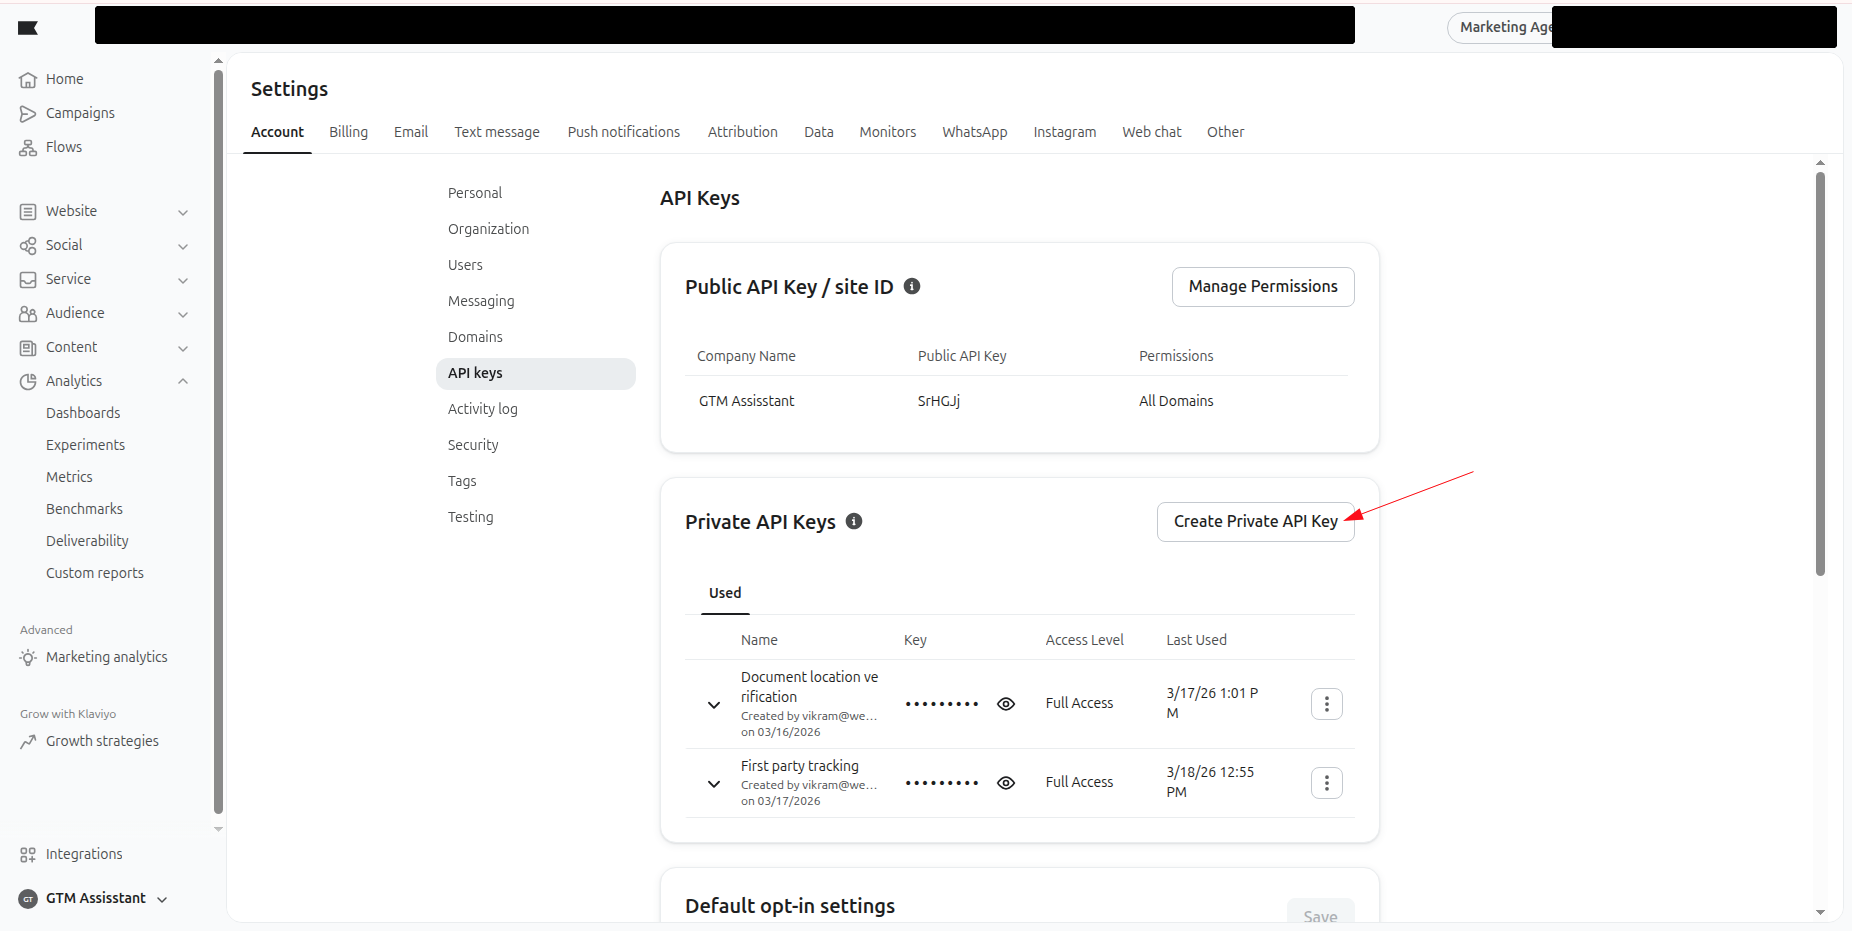
Create a Private API Key
- In Private API Keys, click Create Private API Key.
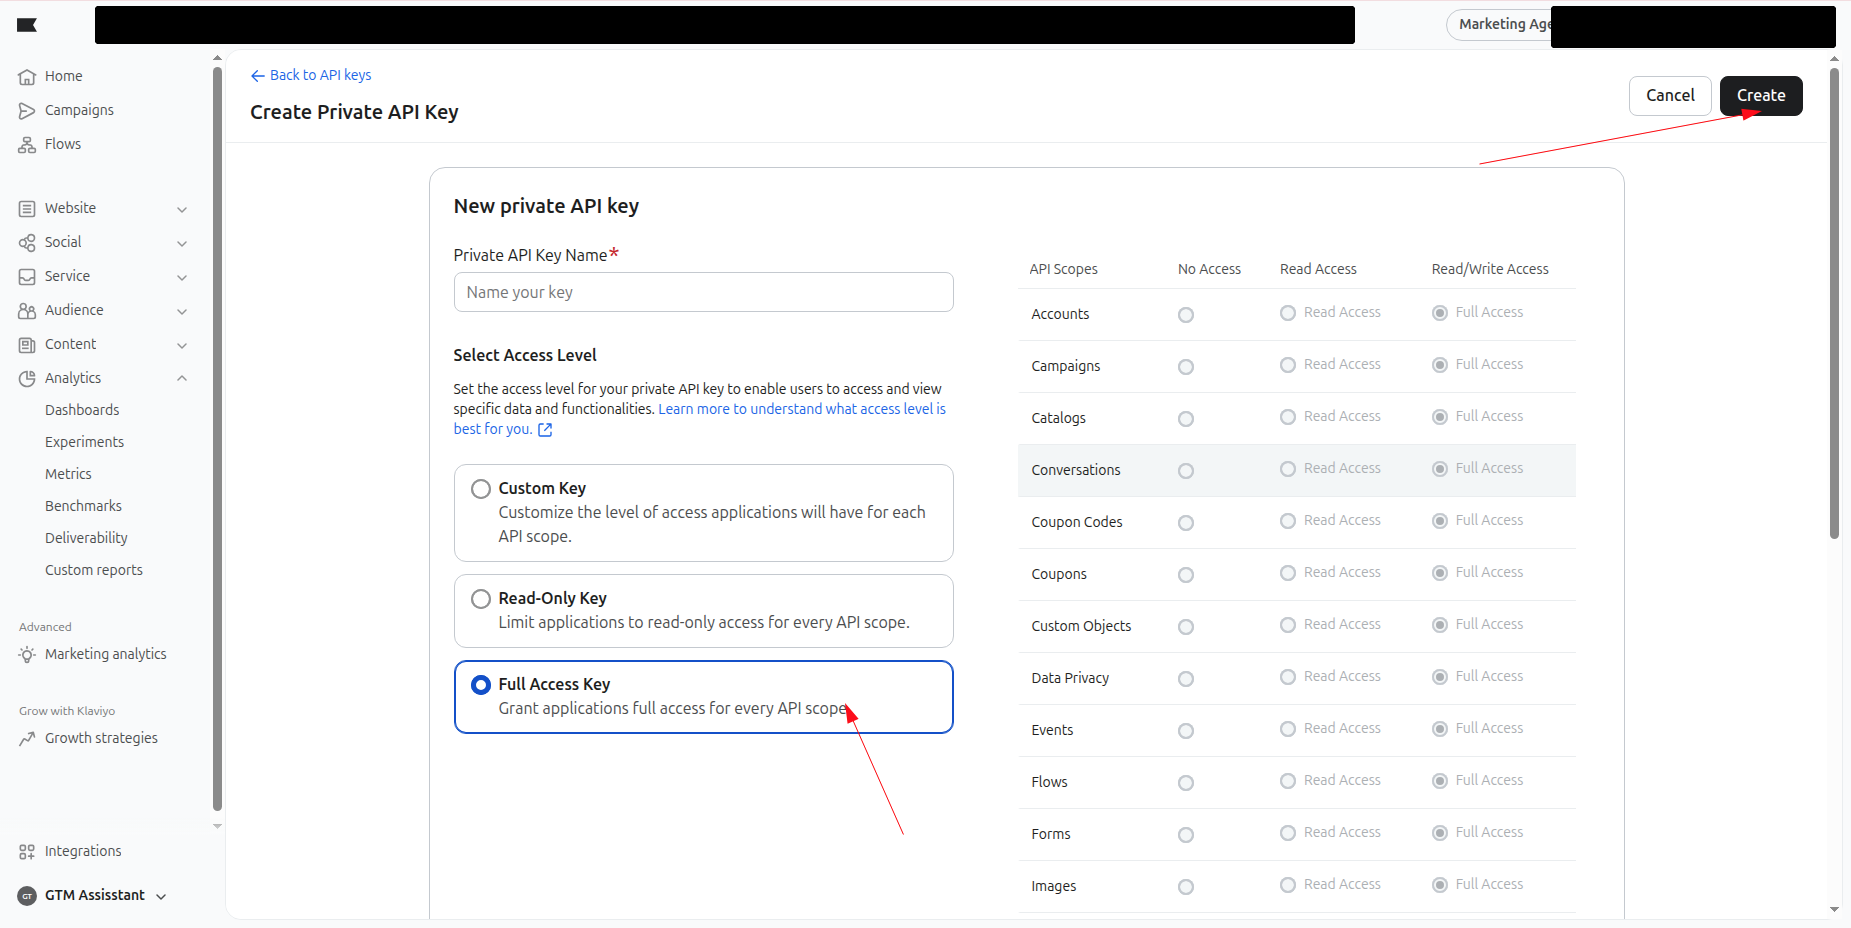
- Give the key Full Access so Webgarh GTM Assistant can send tracking events.
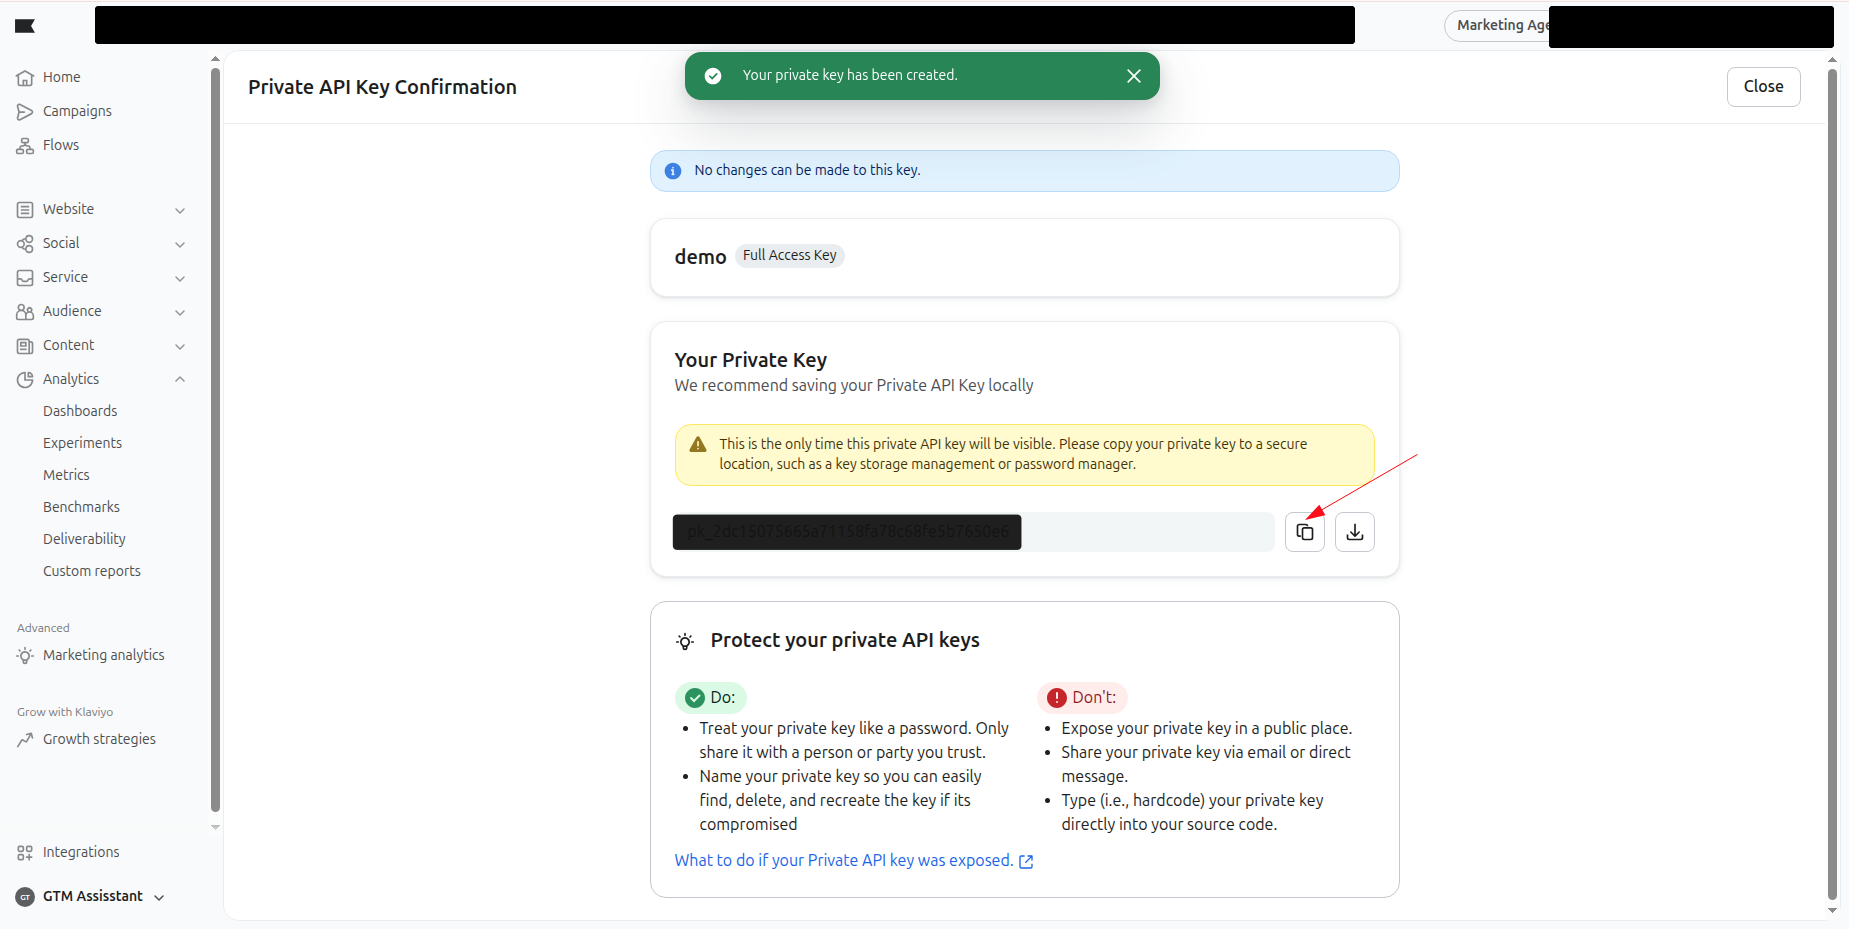
- Click Create and copy the key immediately.
Connect in Webgarh GTM Assistant
- Open the Klaviyo section in Webgarh GTM Assistant and click Connect.
- Enter the Site ID and Private API Key.
- Click Next.
- Select the events you want to track.
- Click Save and wait for Connected status.
Copy the Private API Key immediately after creation. Klaviyo will not show it again later.
Visual Walkthrough
Use the screenshots below alongside the steps above to match each instruction with the correct screen in the platform.

Still need help?
Our team can walk you through this. Contact support or message us on WhatsApp.